Adventures with Fondant
Wow. Just, wow. Today was definitely a learning experience! In step 1 of a friend’s rather complicated birthday cake, I made fondant for the first time ever. Bakingdom‘s Marshmallow Fondant, to be exact.
Now, I don’t have a microwave, or a double boiler, so it was down to a pyrex bowl and a sauce pan. I was really worried about the marshmallows burning, since I know candy burns easy. However, the marshmallows melted nicely, and mixed well. I just had to add them slowly so as not to over flow my bowl.
Mixing was another story. Oh. My. God. Never use an electric hand-held mixer for fondant unless you have a second person there to hold the bowl. If you try to do it yourself either A) Your bowl will be spinning like the Tasmanian Devil, or you will have marshmallow strings being flung across your kitchen. I eventually gave up on mixer and did it by hand, in the bowl, because, well, I didn’t have enough clean counter space to do it there.
So after a bit of elbow grease, and a whole lot of sticky fingers, I got myself a nice ball of fondant dough.
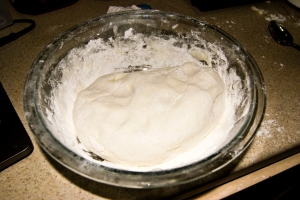 As you can see, there was powdered sugar EVERYWHERE. Next time I decide to make something with fondant I will definitely wait until I have a fancy stand mixer.
In a few days I’ll have another post with the sculpting. Should be fun!
Simple baked squash
Another simple and delicious recipe from simplyrecipes.com (can you tell one of my favorite recipe sites?) I was looking for a yummy way to eat some veggies, something warm and simple, and this baked acorn squash sounded amazing. And it was!
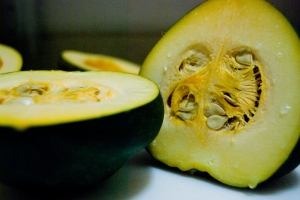
Half a squash would have been enough to feed me, but Hubster didn’t think so, and we bought two. I think ours might not have been ripe enough yet (I’ve never bought squash before so I just had to guess). Cut the squash in half from the stem down and scoop out the seeds and guts.
 After scooping out the insides score the squash with 3 horizontal and 3 vertical lines. Be careful not to puncture the skin or you’ll lose all your yumminess! I didn’t do a very good job of cleaning out the strings (I blame inexperience) so not everything got soaked in during the cooking process. Make sure to scoop out as much of the strings as you can! It’s important!
Smear softened butter on the squash (I put most of it on the flat edges on top) dump in brown sugar and drizzle with maple syrup. Place in a casserole dish and put about an inch of water in the bottom to prevent burning. (For some reason I didn’t take any pictures of this process.) Put in the oven for an hour until the squash is soft when poked with a fork.

After it’s all cooked, put it in a bowl and enjoy! On Simply Recipes it looked glazed, while mine was filled with a liquid brown sugar soup thing. Hubster blames me for not cleaning out the guts enough. He says if I had done that the soup would have soaked in more. Either way, it was still delicious!
Recipe: taken from Simply Recipes
INGREDIENTS
1 Acorn squash
1 Tbsp Butter
2 Tbsp Brown Sugar
2 teaspoons Maple Syrup
Dash of Salt
METHOD
1 Preheat oven to 400°F.
2 Using a strong chef’s knife, and perhaps a rubber mallet to help, cut the acorn squash in half, lengthwise, from stem to end. Use a spoon to scoop out the seeds and stringy stuff in the center of each half. Score the insides of each half several times with a sharp knife. Place each half in a baking pan, cut side up. Add about a 1/4 inch of water to the bottom of the baking pan so that the skins don’t burn and the squash doesn’t get dried out.
3 Coat the inside of each half with 1/2 a Tbsp of butter. Add a dash of salt if you are using unsalted butter. Add a Tbsp of brown sugar to the cavity of each half. Dribble on a teaspoon of maple syrup to each half.
4 Bake in the oven for 1 hour to 1 hour 15 minutes, until the squash is very soft and the tops are browned. Do not undercook. When finished, remove from oven and let cool a little before serving. Spoon any buttery sugar sauce that has not already been absorbed by the squash over the exposed areas.
Serves 2 to 4, depending on how much squash you like to eat.
Panko-Crusted Fish, and Roasted Potatoes
Wow, so I haven’t been on here in a while. I’ve been taking pictures (when I actually do cook) I just haven’t gotten around to posting any. That should change, and I will try to be much better from now on!
Anyways! On to the food!
This was dinner last night, and let me tell you, it was delicious! The recipe is from simplyrecipes.com and can be found here. I changed the recipe a little bit, due to not having fresh herbs on hand. I used Italian Seasoning instead, and it came out great. I also used about half of the panko, since I only had two pieces of fish, not three, and I think it was too much. Either that or I didn’t use enough mustard…
A very simple recipe, for prep I only dirtied one dish!

First line a pan with foil, and place your fish skin side down. I would suggest greasing the foil with a bit of olive oil, as my skin stuck to the foil, not the fish. Sprinkle fish with salt and pepper, then smear with honey mustard. This was not enough mustard, and the crust was TOO dry. I suggest adding more. After mustard sprinkle on fresh herbs or dry seasoning, whichever is available.

In a medium mixing bowl (the only one you’ll dirty!) mix panko, herbs/seasoning, paprika, and olive oil. I completely ignored the directions, to be honest, and just sort of dumped everything in the bowl. I used 1/3 cup of panko and each piece of fish had a generous heaping on top. Hubster liked it, but it was too much for me. Next time, as I’ve said before, more mustard or less breadcrumbs.
Originally I was going to make the fish with an asparagus recipe also from simplyrecipes.com. However due to power outages, distractions, and general laziness over the past few weeks, said asparagus went bad. Horrible and wasteful, I know. So, I had potatoes in the cabinet from a previous dinner (which silly me never took pictures of), and decided to use those instead. The only problem? The potatoes needed to be cooked for 30 minutes at 450, and the fish 12 at 400. My solution? Dump the potatoes in the toaster oven! (ignore the grease coating on the inside of the oven, please. It’s old and refuses to come off)

The potatoes are, like the fish, super easy to make. Quarter a handful of small red potatoes, and place on a foil lined baking sheet. Drizzle with olive oil, sprinkle with the same fresh herbs/seasonings as the fish, salt and pepper to taste, garlic powder (if you want) and freshly grated Parmesan cheese. Toss the potatoes to make sure they’re coated and toss them in the oven. Make sure after 15 minutes or so to turn them, or else they’ll stick to the foil something nasty.

When everything is all nice and brown, and the fish flakes easily, pull it out, plate it, and enjoy!
Recipe: taken from Simply Recipes
INGREDIENTS
4 teaspoons olive oil
4 pieces thickly cut, boneless salmon (each 6 oz)
Salt and pepper to taste
2 Tbsp honey mustard or sweet-hot mustard
2 teaspoons chopped fresh thyme
2/3 cup panko bread crumbs
2 Tbsp chopped Italian parsley
1/2 teaspoon Hungarian sweet paprika
1 Preheat the oven to 400°F (convection or regular). Set the salmon on a foil-lined baking sheet skin side down. Sprinkle with salt and pepper.
2 In a small bowl, combine the honey mustard and 1 teaspoon of the thyme. In another small bowl, mix the panko with the remaining 1 teaspoon of thyme, 4 teaspoons of olive oil, parsley, and paprika. Add salt and pepper (a light sprinkle).
3 Using a small spoon, spread the mustard mixture on the salmon; top with the bread crumb mixture.
4 Roast the salmon for 12-14 minutes (test at 10) or until it is almost completely firm to the touch and flakes when poked with a fork. Serve at once.
Serves 4.
Pure Decadence
Decadence is exactly what this cake is. It’s moist and chocolaty, and gooey, and amazing.

Doesn’t that look amazing? Chocolate, on top of marshmallows, on top of chocolate. You know you want it.
This is a bit of a family, recipe actually. My grandmother made it for my mom, and she made it for us. Now, I’m not sure if GG made the modifications to the original recipe, or if Mom did, but this is the way it’s going to stay being made in my family, forever. The original recipe is from Coca-Cola. It’s one of their “Heritage” Recipes, and if you wish to do it the way they want you to, it can be found here.
It’s a pretty simple recipe for the most part.
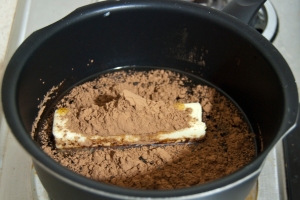
After mixing the flour and sugar in a large bowl (and I do mean large) boil butter (yes, that is a full stick), coke, oil, and cocoa powder. Be careful not to let it burn, because then you have to restart.
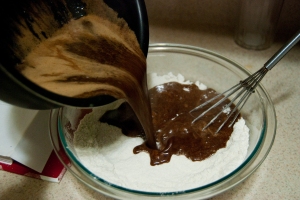
Pour the hot mixture onto your dry ingredients and stir. This is why a large bowl was needed. Mine is almost too small not to make a mess everywhere.
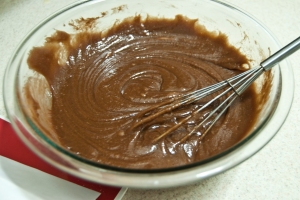
It’ll be nice and thick and chocolaty. Yum.
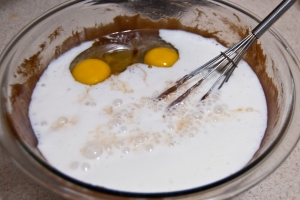
It says to dissolve the baking soda in the buttermilk before adding it. I’m not sure why this is important, but I do it anyways. Also add the eggs and vanilla at this time. Stir it all up, pour into a greased 9×13 pan, and pop in the oven for 35 minutes.
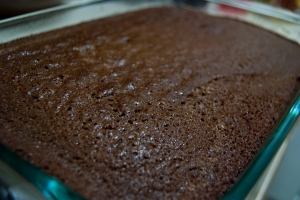
Doesn’t that look yummy? But we’re not done yet!
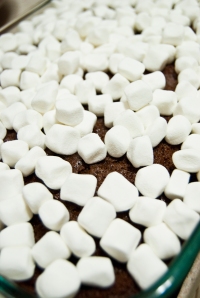
Pour lots and lots and lots of marshmallows onto the cake. Lots. Of. Marshmallows.
For the icing you melt ANOTHER stick of butter (Paula Dean would be proud) more coke, and more cocoa powder in a pot. None of my pictures came out very well of this, but it’s all the same as it looks just like the picture of the pot above. In fact, I used the same pot!
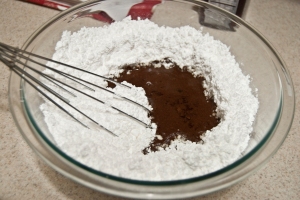
Dump the hot liquid into a large bowl full of a full 16oz box of powdered sugar, and mix until only slightly lumpy.
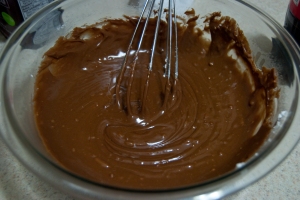
Note: If you don’t do this fast enough, and it starts cooling down, your icing will start to thicken. But that’s ok.

Pour the icing on top of the cake and marshmallows, scraping as much out of the bowl as possible (you can lick the bowl later). If you want to (and I always do) you can pop the cake back into the oven for another 5-10 minutes to let the marshmallows and icing melt a bit. It’s amazing.
Recipe:
Cake:
2 cups sugar
2 cups all-purpose flour
1/2 cup butter or margarine
1/2 cup vegetable oil
3 tablespoons cocoa
1 cup Coca-Cola®
1 teaspoon baking soda
1/2 cup buttermilk
2 eggs
1 teaspoon vanilla extract
One bag Mini-Marshmallows
Frosting:
1/2 cup butter
3 tablespoons cocoa
6 tablespoons Coca-Cola
1 box (16 ounces) confectioners’ sugar
1 teaspoon vanilla extract
1 cup chopped pecans (optional. I never use them)
Preheat oven to 350 degrees. In a bowl, sift sugar and flour. In saucepan, mix butter, oil, cocoa, and Coca-Cola. Bring to a boil and pour over dry
ingredients; blend well. Dissolve baking soda in buttermilk just before adding to batter along with eggs and vanilla extract, mixing well. Pour into a well-greased 9- by-13-inch pan and bake 35 to 45 minutes. Remove from oven, spread marshmallows on top in single layer and frost immediately.
To make frosting, combine butter, cocoa and Coca-Cola in a saucepan. Bring to a boil and pour over confectioners’ sugar, blending well. Add vanilla extract. Pour over cake. If needed, put in oven at 350 degrees for 5-10 minutes. When cool, cut into squares and serve.
Strawberry & Vanilla Cake

Oh my god. This is a veeery simple recipe (since I used a box mix, and canned icing) but it’s still super yummy. The cake came out super moist, and the strawberries add sweetness to the vanilla cake.

Here’s what you need. Cake mix (Betty Crocker Super Moist is now my favorite), icing, oil, water, eggs, and fresh strawberries.
I skipped the whole making the cake part, as the box mix explains it rather well.

Slice Strawberries and add them into the cake batter. The box says to use an electric mixer to make the batter, but I don’t have one, so a whisk was used. I would suggest gently folding in the strawberries into the batter. A mixer would pulverize the berries. Which could be good, too….

Bake the cake as directed by the box! As I’m broke I don’t actually own round cake pans. So I used two separate square pans. One of which happened to be 8×8 while the other was 9×9 resulting in…

Uneven layers! Lots of fun. I trimmed the extra inch off of the “larger” layer, which happened to be thinner as I’m (obviously) horrible at splitting batter. Due to how moist the cake was (and the strawberries) even though I greased the pan down really well, a chunk ended up missing from the top layer. And due to how moist it was I was unable to remove the two layers to ice between them… oh well. It still came out looking pretty, if I do say so myself!

Lack of cake-platter meant me using a cookie sheet to hold the cake…eventually I’ll have decent bakeware!
So, yes, a super-delicious and easy to make cake. It has earn the husband’s seal of approval (he demanded seconds) so it’ll be made again in the future, I don’t doubt.
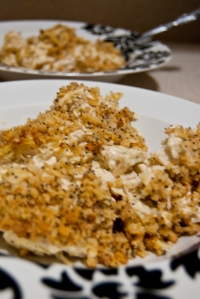
World Famous Chicken Casserole
I can say that. A friend from England loves it. In fact, everybody I’ve made this for loves it. So you will too. It’s a super simple recipe, originally gotten off the internet somewhere by my mother, but I lost the recipe years ago.
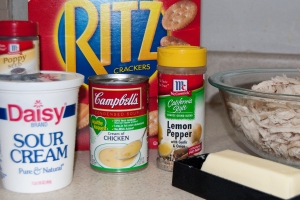 Start with the ingredients. Chicken, Ritz Crackers, Cream of Chicken soup, Sour Cream, Butter, Lemon Pepper, Poppy Seeds.
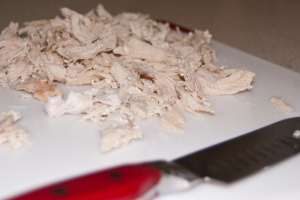 Boil and Shred your chicken. Or do like my mom used to do. Skip the boiling and buy a rotisserie chicken from the store.
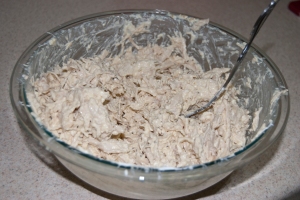 Mix with the Soup, Sour Cream, and Lemon Pepper (optional, but we put lemon pepper in, oh, just about everything)
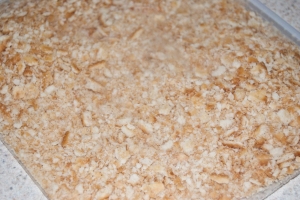 Now, for the stress relief! Crush up Crackers in a Zip-loc baggy. Big, small, microscopic, up to you. I do a mix.
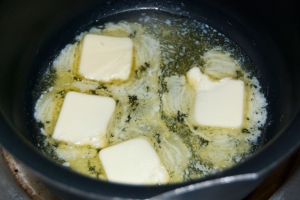 If you’re a normal person and own a microwave, dump your butter in a bowl and nuke it. I, however, do not own a microwave so I get to melt my butter the old fashion way!
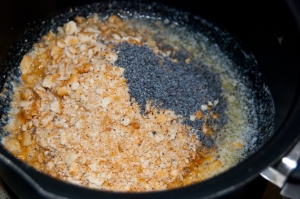 Once butter is melted add the crushed crackers and poppy seed.
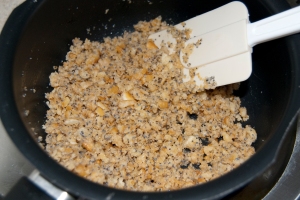 Mix well! Yum, my favorite part! Note: If your crackers look too dry or too moist, you can always add more butter/crushed crackers as needed.
 Put everything in a 8×8 casserole dish. I always use a glass one.
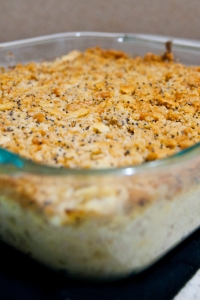 Heat until Golden Brown and Bubbly!
Recipie:
Servings: 2-4
4 Boneless Skinless Chicken Breasts, boiled and shredded OR one whole chicken, cooked, de-boned and shredded
11.5 oz can Cream of Chicken Soup
8 oz Sour Cream
1 tsp. Lemon Pepper (optional)
4 tbsp Butter or Margrine
2 tsp poppy seeds
Roughly 25 Ritz Crackers, crushed
Preheat oven to 350 degrees.
Mix shredded chicken, cream of chicken soup, sour cream, and Lemon Pepper, in a large bowl. (add more soup & sour cream for a creamier casserole)
Dump into 8×8 un-greased baking dish.
Melt butter. Add crushed crackers and poppy seed. Mix thoroughly.
Sprinkle cracker mixture on top of chicken mixture.
Cook at 350 degrees for 20-25 minutes until top is golden brown and mixture is bubbly.
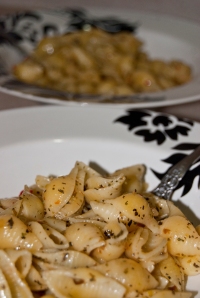
Italian-ish Pasta
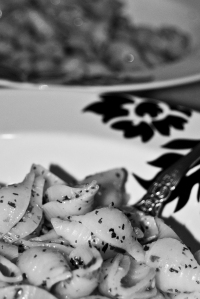 Italian-ish Pasta is something I made up completely on a whim, and it has gone over rather well with friends and my husband. It’s a very simple recipe, with very few ingredients, and near infinite possibilities.
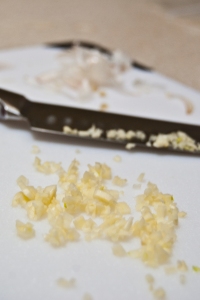 Garlic is the starting ingredient for many of my recipes. I don’t have a press, so I have to mince it as best I can.
 Boil and drain pasta of your choice. I chose shells because, well, I like shells.
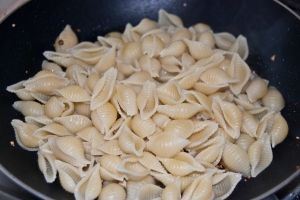 Heat a large pan, pour in Olive Oil, saute garlic, and add pasta.
 Add dressing, seasoning, and salt and pepper to taste. Make sure pasta is heated (cold dressing can cool the pasta).
Recipe
Servings: 2
Enough pasta of choice to feed 2
2 cloves of garlic
1 tbsp Extra Virgin Olive Oil
4 tbsp Italian Dressing
1 tsp Italian Seasoning
Boil pasta as instructed by packing until cooked completely.
While pasta is cooking, mince garlic and heat pan. As the pasta is almost done cooking, pour oil into the pan, toss in garlic to brown, and drain the pasta.
As the garlic browns, add drained pasta, Olive Oil, Dressing and Seasoning, stir until coated, and heat until dressing is no longer watery. Add salt to taste, and enjoy.
Possible Additions:
Shrimp
Bell Pepper
Chicken
Hello world!
Hello and Welcome to Accidentally Delicious!
I have only recently started cooking and baking on a regular basis. I have a tendency to experiment, and adapt recipes, and they tend to come out rather good. So I decided to start this blog so others can try them, too.
Well, enjoy the Deliciousness!
